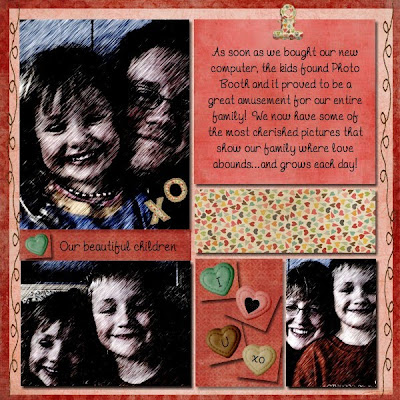
I'd like to share with you how easy it is to use My Memories Suite utilizing paper and embellishments I've found in shops and boutiques on line (you are not limited to just the kits and paper sold at My Memories Suite). The possibilities are endless, much like the Internet itself! Let me share my page and explain how easy it is to import all these fun papers, embellishments and templates into My Memories Suite!

Credits: Background papers and embellishments are from the Yours Truly kit at The Shabby Shoppe (TheShabbyShoppe.com); Font LD Doodle Script
1. Create a new album choosing the "Design Your Own" option, name it and select the appropriate size. At this point, you also have the option of adding photo templates or having just a blank page. I usually start with a blank page and create my own photo templates. Note: if you prefer to use photo templates that are already created in the Photo Layouts Gallery, select it now to add on the blank page. By the way, don't you just LOVE the new Resource Gallery??? I think I can't live without it!
2. Select your background papers. Create a photo box and cover the entire page (if you chose a Photo Layout from the gallery, simply cover the entire page covering the layout - we'll make it work in a minute!) This will be for the background paper. In the Control Panel, select Background Papers and the "Custom" button. Navigate to the file where your digital scrapbooking goodies from other companies are saved and choose the background papers to use. (If you used a Photo Layout, choose your background paper and "arrange the order" of the paper by selecting Arrange, Order, "send to back" - this will put the paper in back of your existing photo layout on the page). You can layer your background papers simply by creating more photo boxes of different sizes and follow the previous steps. On the page above, I utilized 2 backgrounds: red covering the entire page and then a pink that's slightly smaller.
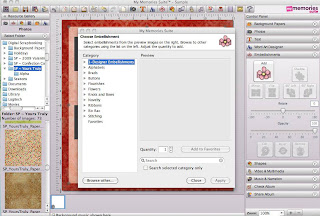
4. Adding embellishments is easy! In the Control Panel, select Embellishments, Add, and select the "Browse other" button to navigate to the file where the embellishments you intend to use are located. Select and place on your page as usual. Don't forget to use the new "zoom" option on the bottom right side of the Control Panel. This is a great tool to use when you need to place items exactly on a page!

5. You can repeat these steps over and over utilizing any paper, embellishment or template you find! Utilizing templates is easy - place them on your page and simply create photo boxes where the photos are to be placed. Wa la! You are now faced with unlimited options for pages. Now what do you do with this new found knowledge? Get digi-scrappin' of course!
3. Once backgrounds are in place, you can create your own photo boxes (or use the layout you added above). Add your photos.
4. Adding embellishments is easy! In the Control Panel, select Embellishments, Add, and select the "Browse other" button to navigate to the file where the embellishments you intend to use are located. Select and place on your page as usual. Don't forget to use the new "zoom" option on the bottom right side of the Control Panel. This is a great tool to use when you need to place items exactly on a page!

5. You can repeat these steps over and over utilizing any paper, embellishment or template you find! Utilizing templates is easy - place them on your page and simply create photo boxes where the photos are to be placed. Wa la! You are now faced with unlimited options for pages. Now what do you do with this new found knowledge? Get digi-scrappin' of course!
Thank you for letting me share my page with you...this is the first time I've posted pictures of ALL my family on our blog! I hope you enjoyed your stop on our Blog Train and hope you'll visit ALL of the others to collect your key words!
Be sure to stop next at Creative Team Member Beth's blog at stewardshipnotconvenience.blogspot.com.
Happy Valentine's Day!
Jackie
Be sure to stop next at Creative Team Member Beth's blog at stewardshipnotconvenience.blogspot.com.
Happy Valentine's Day!
Jackie


No comments:
Post a Comment